
08|2021
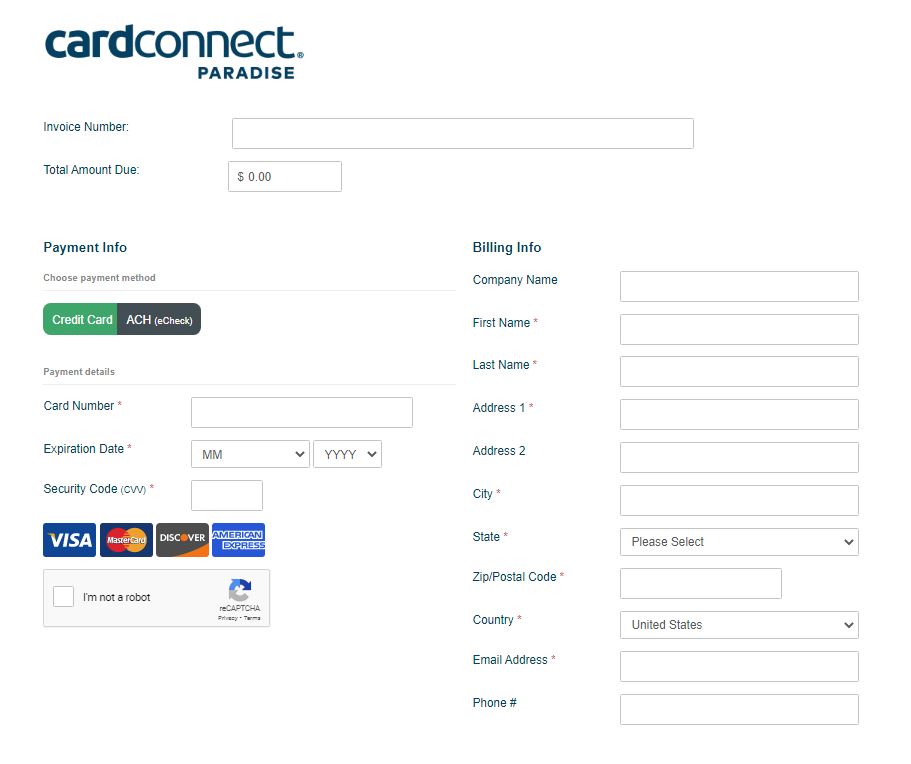
One of Cardpointe’s best features is a personalized hosted payment page. You can text or email a link directly to your customers for remote payment, as well as add a “Pay Now” button to your website! This addition to our platform was instrumental in allowing businesses to continue operation through the closures of the COVID-19 pandemic, and has continued to be an invaluable tool in the merchant’s arsenal. Check out our blog post on HPP to learn more about how the page works.
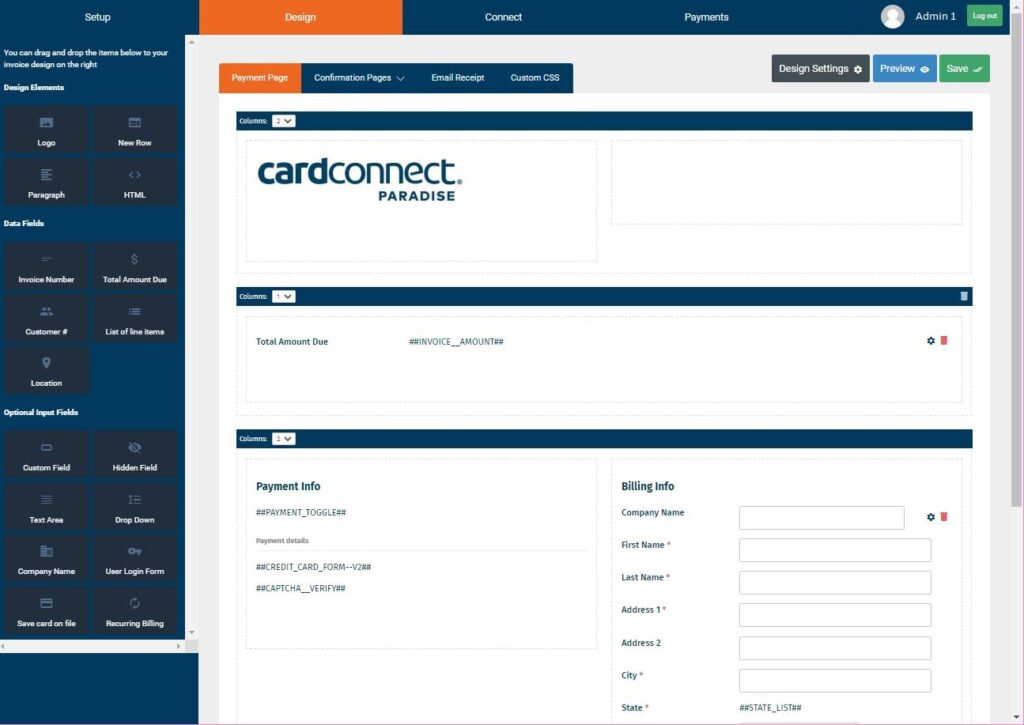
When it comes to setting up your page, there are a lot of customization options to sort through. Most of these are found under the Design tab, and are simple to operate.
Design Features
Editing your page is incredibly easy! Simply click, hold and drag widgets on the page to move them around or bring them in from the left-sidebar. The blue gear symbol to the right of a widget will allow for editing, and the red trash can symbol will remove the widget completely.
Each row has the option for 1-3 columns, which can be used to separate widgets and text on the page for a cleaner look. The New Row widget can be used to add more rows, and rows can be removed by selecting the white trash can symbol on the right side of the blue header.
The Design Settings option in the upper-right corner allows you to change the text size, style and color as well as the background color of your page.
When you’re designing your page, remember to hit the green Save option! This can be found at both the top and bottom right of the page and will ensure you don’t lose any changes you’ve made. You can also preview your page with your design choices by selecting the blue Preview option next to the Save option.
Widgets
Design Elements
Logo – The most important design element is to add your business logo to your page. This lets your customers know it’s yours! You can upload an image format of your logo and choose where on your page you’d like it to appear – most of our merchants like it right at the top for easy visibility.
New Row – This is a basic editing feature for your page. The New Row element allows you to add an additional row to your page in order to better separate your widgets.
Paragraph – The Paragraph element is how you can add text to your page. This is often used to specify return policies, explain payment options or add disclaimers.
Data Fields
Invoice Number – This data field allows a customer to enter an invoice number to reference their payment.
Total Amount Due – Don’t remove this field from your page! This allows a customer to specify the amount of their payment and payments cannot be accepted without it.
Customer Number – This data field allows a customer to enter a customer number to reference their payment.
List of Line Items – Putting this data field on your page provides you with the ability to send itemized payment requests through the Connect tab. An additional option is to make these line items selectable for your customers.
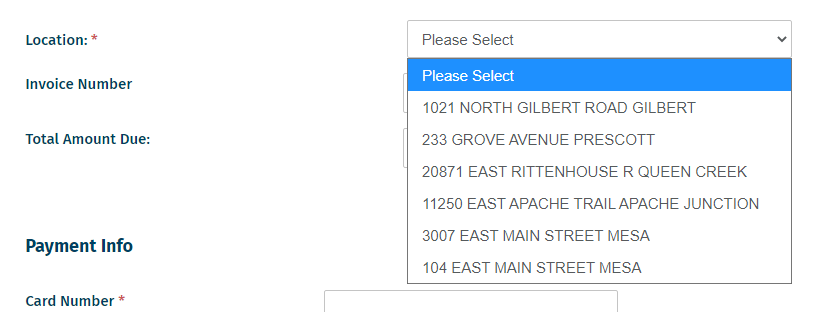
Location – Many merchants have multiple accounts for separate locations. This data field allows you to have more than one merchant account linked to your page, and your customers can select which location they are submitting a payment to.
Optional Input Fields
Custom Field – This is the most diverse input field for your page. Using the Custom Field allows you to specify any information you’d like your customers to provide such as order details, car make/model and service address to name a few.
Hidden Field – These are fields that are hidden from the customer. Usually utilized when sending individual payment requests to customers, Hidden Fields are used to reference a payment with information the merchant does not want the customer to have access to.
Text Area – This field is very similar to Custom Field. Customers are able to type in answers to questions and specific information requested on the page. The text area option has more space than the custom field option and should be used when more detailed or extensive information is requested.
Drop Down – The Drop Down option allows you to enter values your customer can choose. This is often used to assist your customer in showing what the payment is for or selecting custom features for a product.
Company Name – This field is used if you’d like your customer to enter the name of their company when submitting a payment.
User Login Form – If a customer chooses to set up a recurring billing plan, they can create a login to track and manage their future payments.
Save Card on File – If a customer chooses to set up a recurring billing plan, they will have the option to save their card for future transactions.
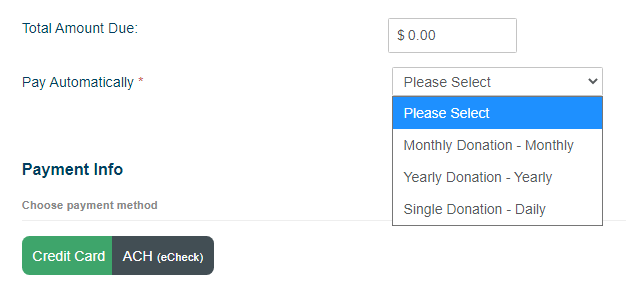
Recurring Billing – This gives customers the option to choose a recurring billing plan. The recurring billing feature is seen most often when asking for donations or setting up subscriptions. Billing plans can be set up in daily, weekly, monthly, and yearly increments.
Contact Us to find out how you can get set up with your own Hosted Payment Page! Check out our tutorial on YouTube and our blog for more articles.
Categories:: Credit Card Processing, Features, Tutorials