
11|2021
Our merchants know that Cardpointe is an incredible gateway. Business owners have access to a fully-customizable virtual terminal, real-time reporting on transactions and funding, open API and more. But what many merchants don’t realize is that Cardpointe also gives them the ability to set up recurring billing for their clients.
Set Up a Billing Plan
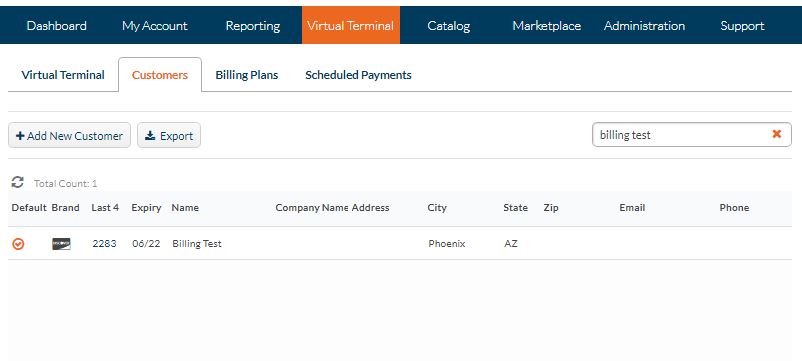
Setting up a billing plan for a customer is as simple as running the transaction itself. First, you’ll want to create a new customer or select an existing customer by going to your Virtual Terminal tab and navigating to the Customers sub-tab. Here, you’ll be able to search for an existing customer or select “Add New Customer”.
Once you’re on your customer’s profile, at the bottom of the page you’ll see a sub-tab for Billing Plans. Here, you’ll be able to see any existing plans that have been set up for this customer, as well as having the option to select “New Billing Plan” and create another.
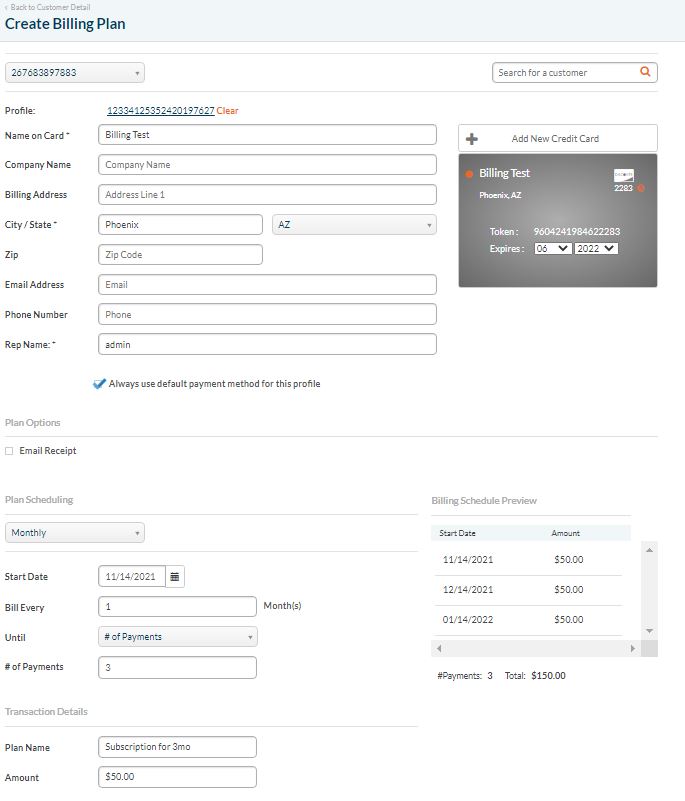
When you’re setting up a billing plan, you’ll have a few options to choose from. Once everything has been specified, select “Save Plan” at the bottom of the page.
- Email Receipt – select this option if you’d like a receipt to be emailed to the customer automatically every time they’re charged during the plan.
- Plan Scheduling – choose whether you’d like the billing plan to run daily, weekly, monthly or yearly. Further details will be selecting a start date for the plan, choosing the intervals for billing, and specifying whether billing will continue until a certain date, a certain number of payments have been made, or until the plan is manually canceled.
- Billing Schedule Preview – when all options have been specified, you’ll be able to see a preview of the billing plan before saving. This is a great way to ensure that all details have been set up correctly.
- Transaction Details – this is where you’ll specify a plan name for easy identification, as well as the amount you’d like your customer to be billed. This amount is not the total amount of the plan, but the amount for each individual transaction.
Viewing and Editing a Billing Plan
You can easily view all of your billing plans, active and inactive, by navigating from the Virtual Terminal tab to the Billing Plans sub-tab. To pull up a specific plan to edit or view in more detail, search for the corresponding customer and then select the Plan ID on the left side to bring up their Billing Plan Details.
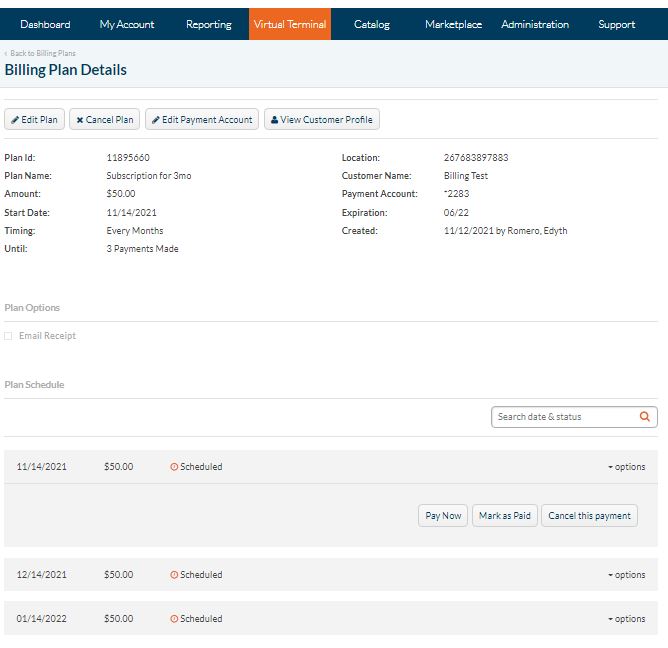
Here you can easily edit or cancel the plan itself, as well as view the customer’s full profile. At the bottom, you’ll be able to see all transactions under the plan and their status – whether they were successful, unsuccessful or still pending. You’ll also be able to cancel an individual transaction, mark it as paid or make a payment in advance.
Check out our video tutorial on recurring billing and Contact Us for more information and to get set up with your own account today!
Categories:: Credit Card Processing, Tutorials