
12|2021
Cardpointe Gateway API allows you to integrate payment acceptance with your own tools, and can be incredibly convenient! This article will cover how to set up a shopping cart on your WordPress website using Cardpointe API and the WooCommerce plugin. No coding required!
Getting Started
For this tutorial, you will need your website to be hosted on WordPress. You’ll need your website’s theme to be compatible with WooCommerce, you’ll also need your Cardpointe API credentials.
The first step will be to download the WooCommerce plugin to your WordPress website. When logged into WordPress, you will see an option for “Plugins” on the left-side dashboard. Select this option and then select “Add New” directly underneath. Search for the term “CardConnect” in the keyword search bar in the upper-right corner and you should see a plugin titled WooCommerce CardConnect Payment Gateway. Click on “Install Now” and then immediately click “Activate” once the option appears.

The second plugin you’ll need to download is titled WooCommerce. There may be a few different options that show up when searching for this plugin, so you’ll want to be sure you’re installing the one that’s by WooThemes. Install and Activate this plugin as well. If it’s the first time you’re installing this plugin, you’ll be temporarily redirected to WooCommerce in order to go through some optional customization before continuing the setup on your website. This setup wizard is fairly simple to go through; just be sure to skip the “Payments” setup tab as we’ll be doing that directly on your website.
Configuring Your Payments
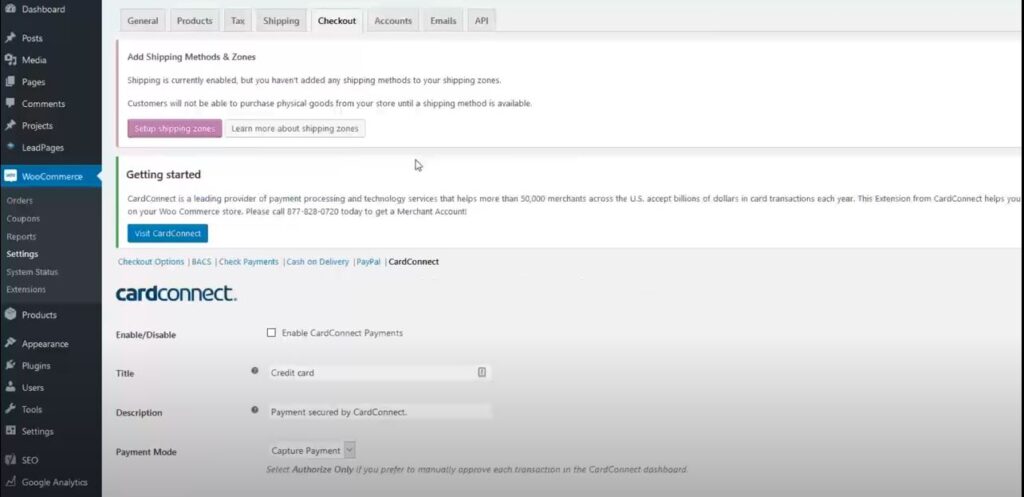
Once you have your Cardpointe API credentials, you’ll be ready to configure your payment gateway setup with the WooCommerce plugin in order to accept payments through your website’s new shopping cart. When logged into WordPress, you’ll see a new WooCommerce option on the left sidebar. Select the “Settings” option when hovering to open up your gateway settings. At the top of the page you’ll see a “Checkout” option which will have a “CardConnect” subtab underneath.
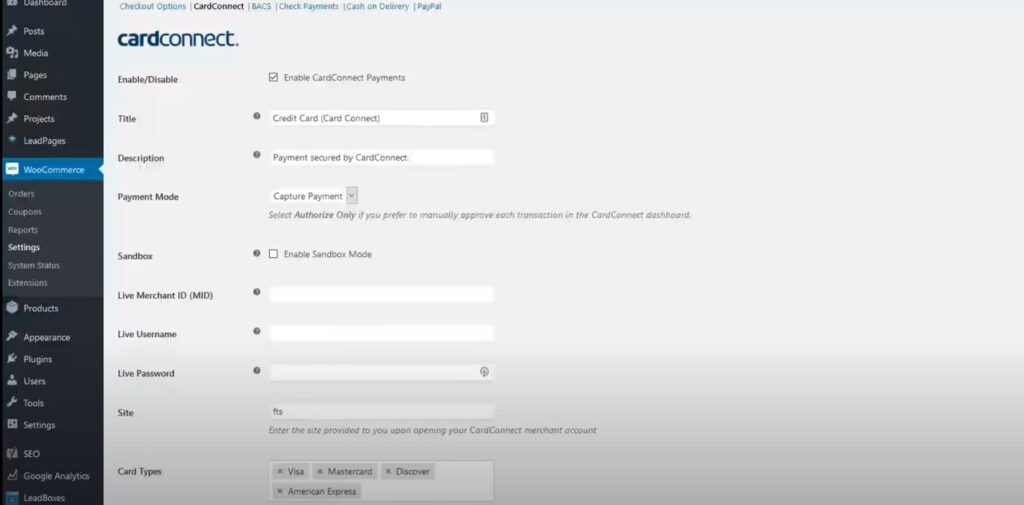
Going through the new options that appear, you’ll want to:
- Enable CardConnect Payments
- Disable Sandbox Mode
- Fill out your Merchant ID
- Fill out your Cardpointe API username
- Fill out your Cardpointe API password
- Fill out the site “fts”
- View the optional settings for saved cards, AVS and CVV verification and card types accepted
- Save
You’ll want to ensure that CardConnect is set as the default payment method in order for your transactions to process properly. Select the “Checkout Options” subtab and scroll down to note that in the Gateway Display Order, CardConnect is specified for Credit Card. You’ll also want to go through the “Check Payment” and “PayPal” subtabs to disable those payment methods.
Final Steps
The best way to test your payment setup is to create a product for your shopping cart. To do this, you’ll go to the “Products” tab underneath WooCommerce on the left sidebar and select “Add Product”. Here you’ll be able to easily set up products for your website by filling out the information requested on the page. Once you’re ready for your product to go live, select “Publish” from the right toolbar.

Once published, your products will be live to view on your website. You’ll also see your new shopping cart system enabled for products which allows customers to add items to their cart, select quantities, and more. Once a customer selects “Proceed to Checkout”, they’ll be asked for their billing details and payment information to complete a purchase.
The design of your shopping cart initially depends on your website’s theme, but can be edited by a web developer/designer. There are many other customized options you can specify through the WooCommerce plugin, such as shipping calculations, membership options and tax rates.
Contact Us to get your Cardpointe API credentials and get started with your own integration today! For more information on the Cardpointe platform, check out our blog and our Cardpointe video tutorial.
Categories:: Credit Card Processing, Tutorials